


Get a Quote
Knowledge Base
IV Startup Guide
4.1 Startup Sequence
On the power socket, turn the main power switch clockwise to power on the machine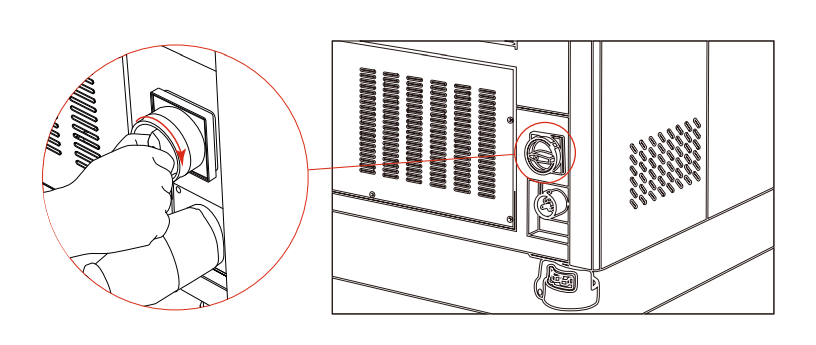
Turn on the machine
Turn the key switch anticlockwise to power on the machine. The laser head will move back to its default origin point. During the reset, do not perform any operations. A beep will sound once the reset is complete.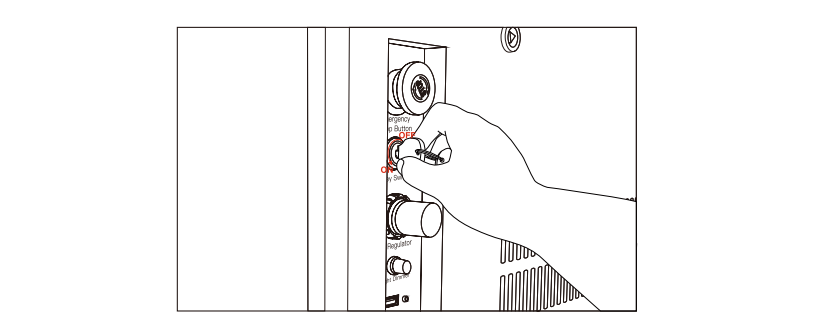
In case of an emergency, press the emergency stop button to immediately cut off power and stop the machine. To resume operation, rotate the emergency stop button clockwise. The button will pop up, and the machine will regain power and initiate a self-check. The laser head will automatically return to its home position with a beeping sound. 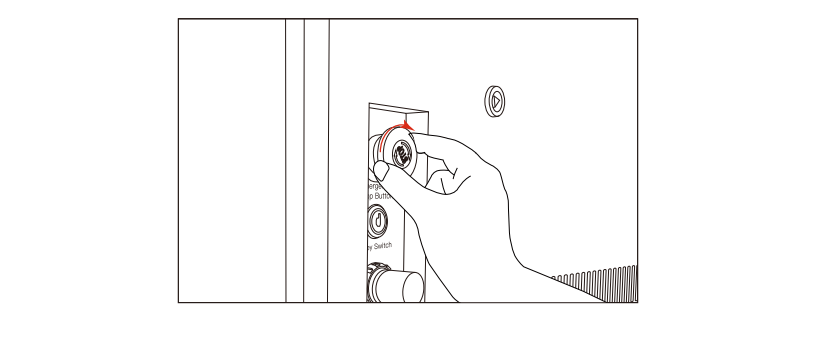
Note: For first-time installation, after the machine is turned on, please do not operate the machine immediately. Wait one to two minutes to allow the water cooling system to fill the laser tube fully. You could open the back lid to check if the laser tube is full of water. Then you could start firing the laser.
4.2 Machine Connection for RDWorks
Install RDworks
RDworks engraving and cutting software is the standard free software that comes with the machine. The software is compatible with the Windows operating system only. You need a Windows computer with XP OS or above. CPU 586 above, recommended that P III or P IV above.
The installation file is saved in the Udisk. Find the Udisk in the toolbox, and plug it into the computer's USB port. Double-click the exe file, and then it will start the setup Wizard
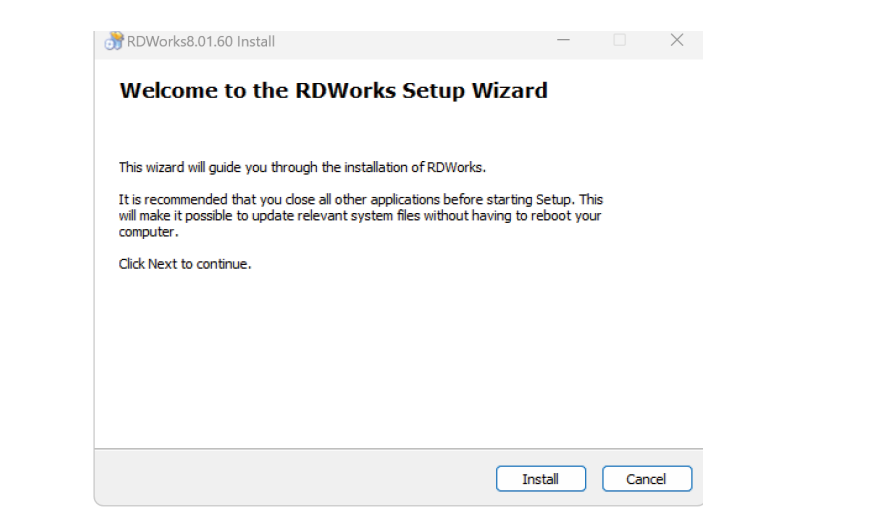
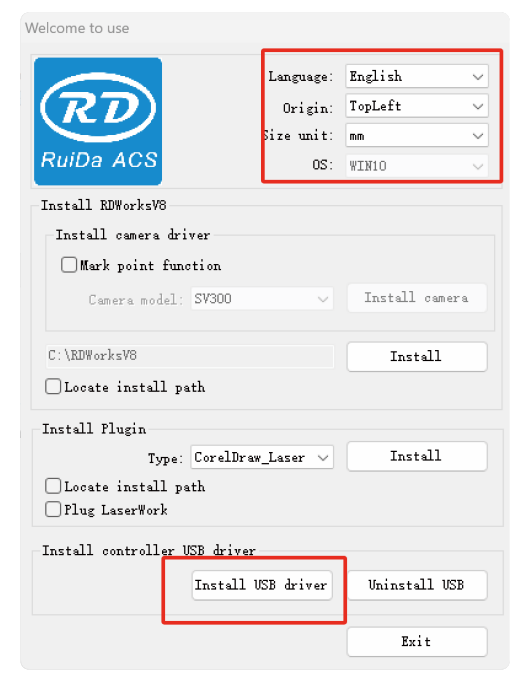
Click install to go to the next.
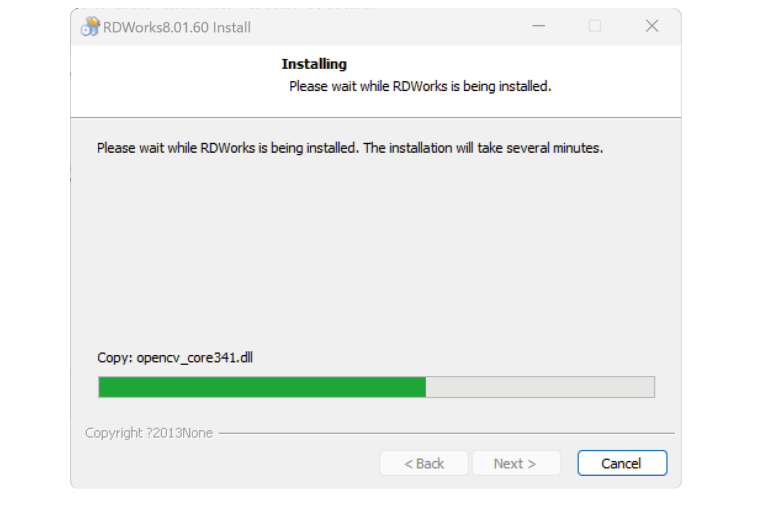
| Select the Language in the top right corner, set the Machine origin to Top-right, choose the size unit from Inch and mm. Don’t forget to install the USB driver. |
|
After that, you could click Exit. Then the software will be installed on your computer.
| You could find the detailed RDworks user manual in the U-disk, or you could download it from here:https://www.aeonlaser.net/support/oftware-download/ |  |
Connect your machine to RDworks with a USB data cable
Insert the data cable into the USB port, and connect the other end to the computer.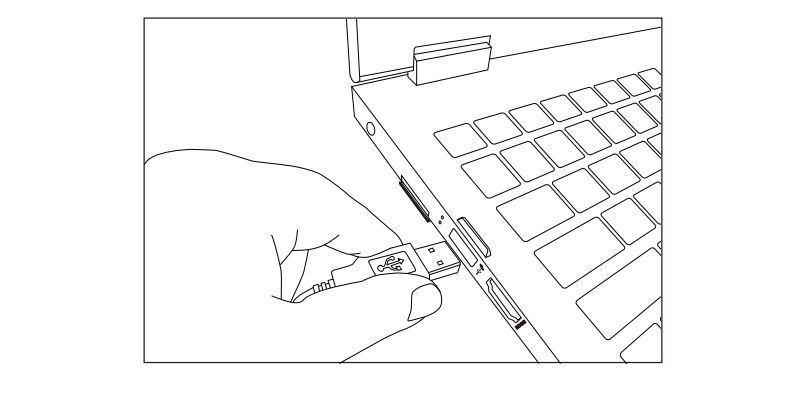
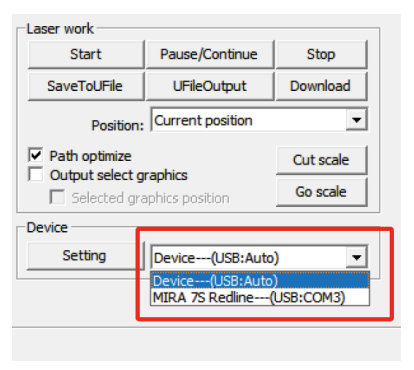
Run RDWorks by double-clicking the  shortcut, et:Device-USB: Auto, and the software will automatically
connected with the machine. 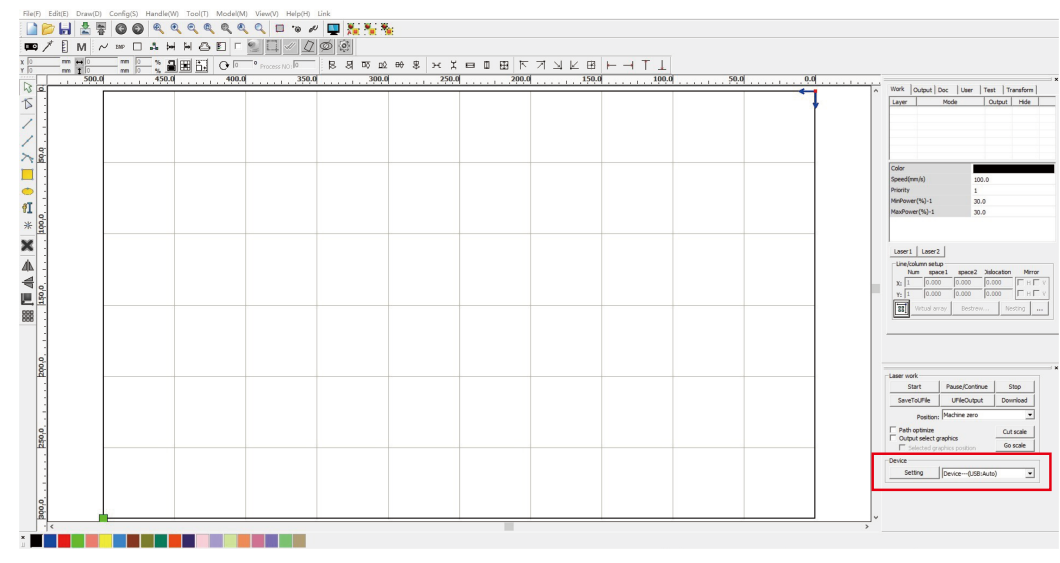
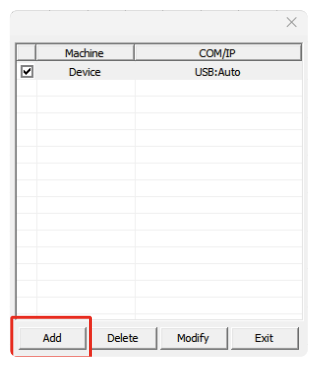
| When there are multiple laser devices connected to the computer, click and click on the popup window to add a new machine. |
|
Give a new name for the device and choose a USB connection. If your computer has an extra USB port, you may
connect more than one machine at the same time. Just choose the port number of the USB.
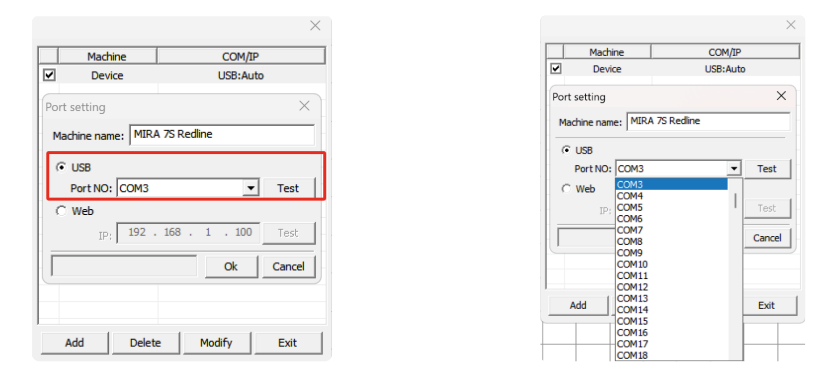
| After adding or modifying, you can click [Test] to check whether the connection with the device is successful. When you need to use one of those machines, click the check box to choose it. |
|
Connect your machine to RDworks with a LAN cable
If you are using a desktop computer or a laptop with a LAN interface, you can connect it to the machine
using the LAN cable provided. Although LAN cables might seem outdated, they offer a reliable connection.
Locate the LAN Cable: Find the LAN cable in the machine's toolbox.
Connect to the Computer: Plug one end of the LAN cable into the LAN interface on your computer
or laptop.
Connect to the Machine: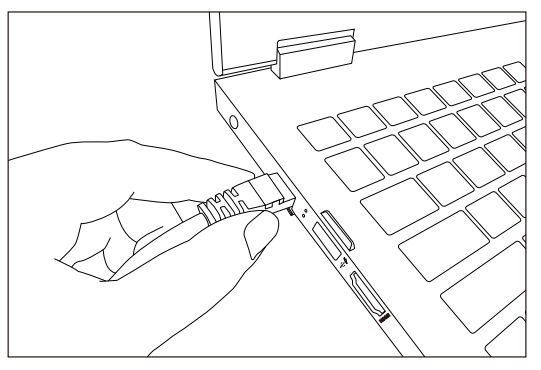
Plug the other end of the LAN cable into the LAN interface on the back of the machine.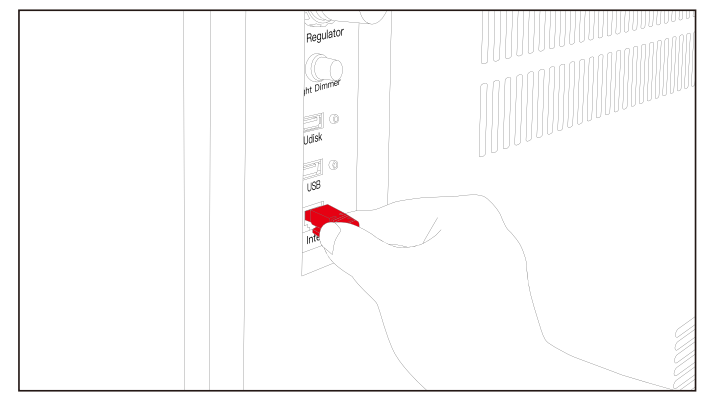
Go to the control panel, press Menu, select IP Config >>, and check the machine's IP address.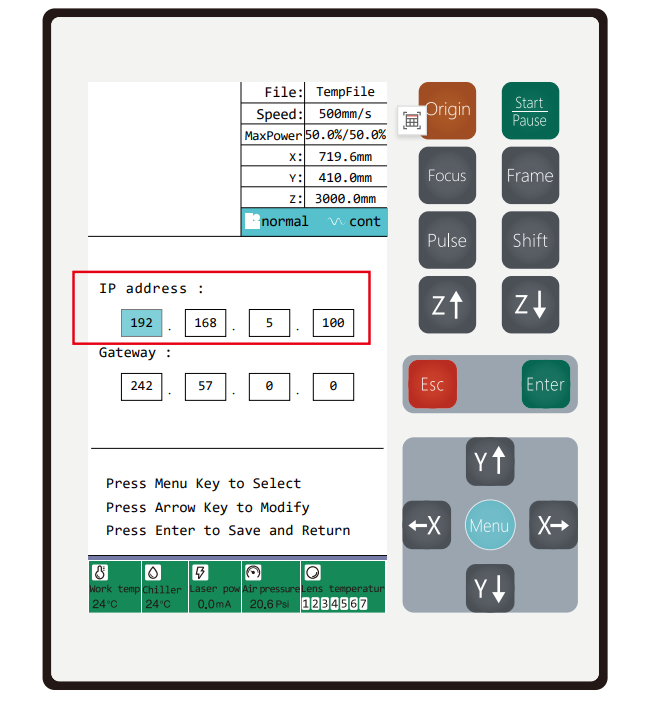
Go to the computer, open the RDworks software, then click Settings: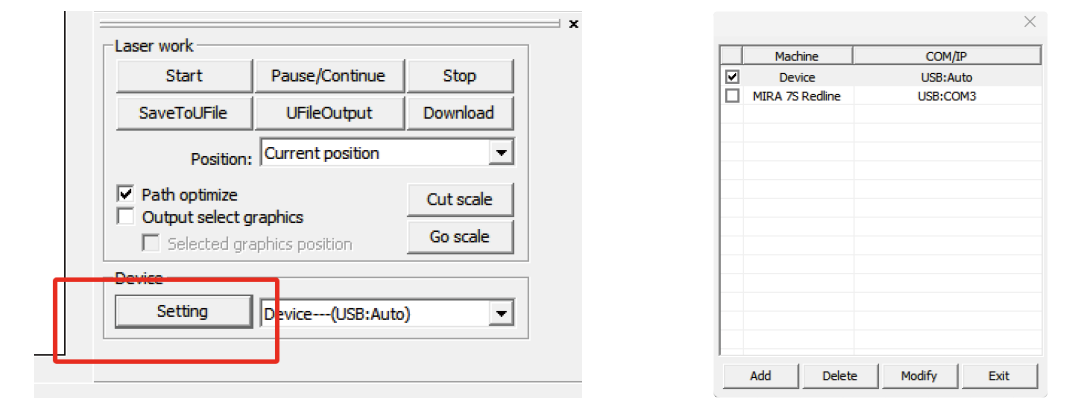
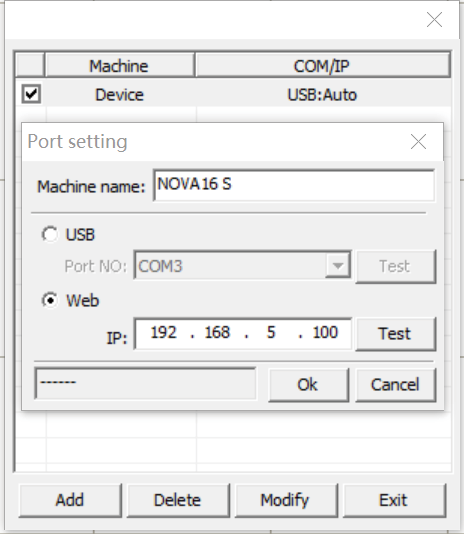
| Click Add>, choose Web, and input the IP address you got from the control panel. You could rename the machine by clicking the Machine Name | 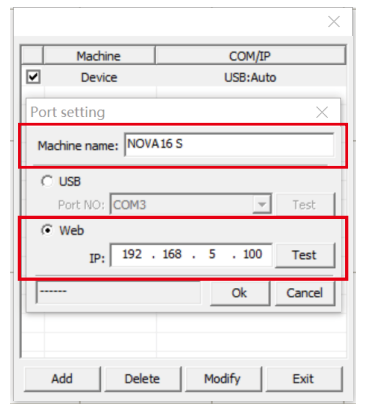 |
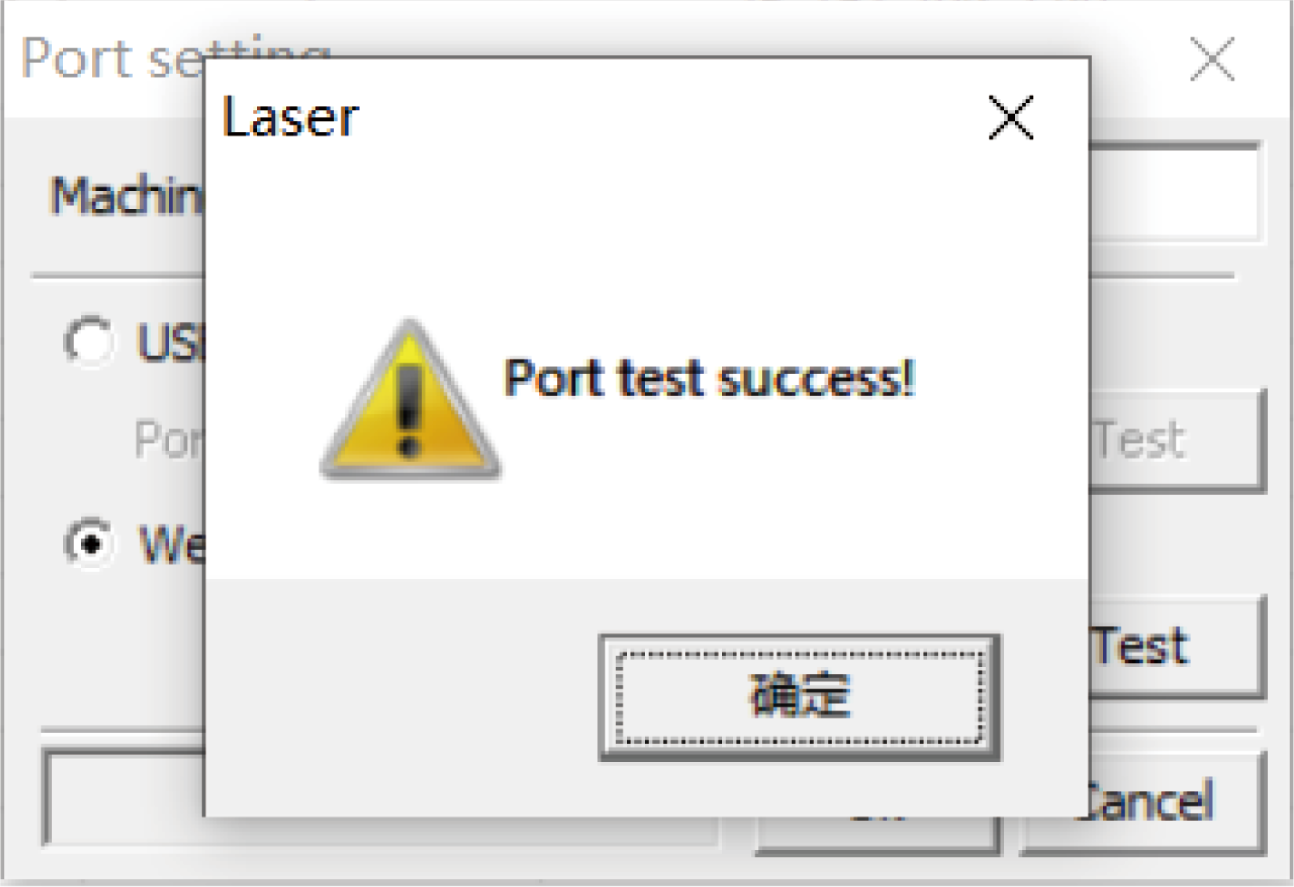
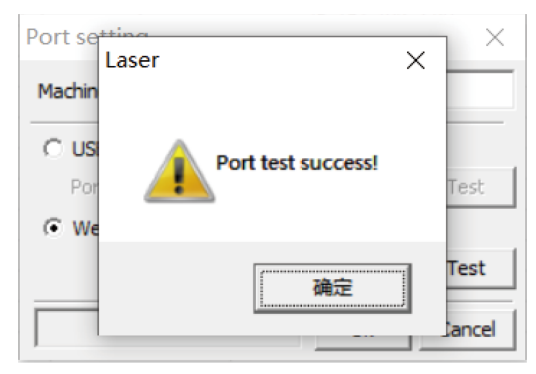 | Click Test, if the machine is connected successfully, it will show “Port test success!” |
| Check the Setting> button of the software, you’ll find the device link | 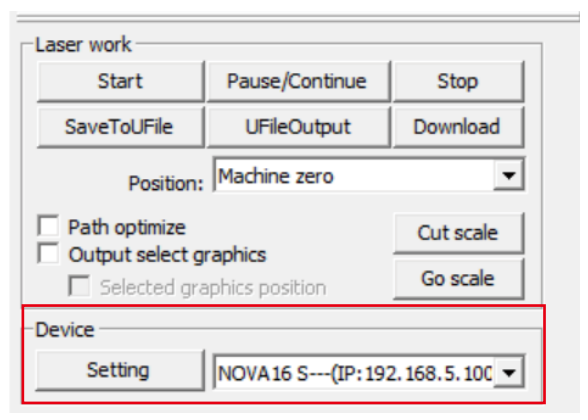 |
Connect your machine to RDWorks via WiFi.
The Redline WiFi has two modes: Access Point (AP) and Client mode.
AP Mode: The machine's built-in router acts as an access point, allowing direct connection between the machine and your computer. Note that this restricts internet access on your computer while connected to the machine.
To begin, you'll need to find your computer's local IP address, which will look something like 192.168.1.19. Open the command prompt (type "cmd" in the Start menu or in the Win+R search box). At the command prompt, type ipconfig, and press Enter. Your results will look similar to this: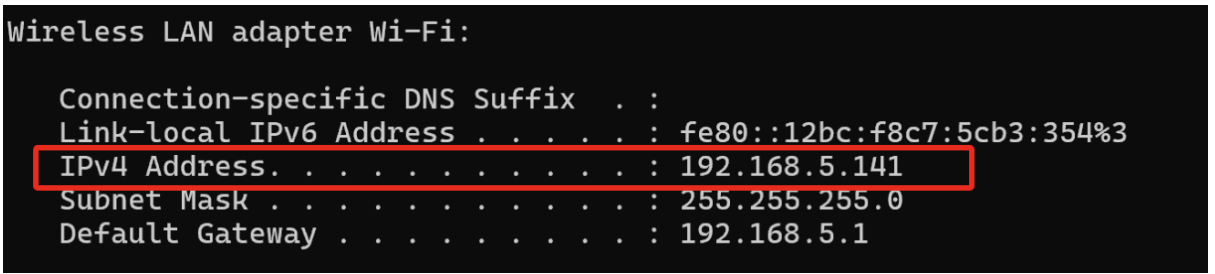 The line labeled IPv4 Address is what you're looking for. The first three segments must remain the same, while the last segment should be a value between 1 and 255 that isn’t already in use on your network. To change the IP address, follow these steps:
In the Main Menu interface, press the key to move the cursor to IP Config and then press the
 key to enter the IP Config interface.
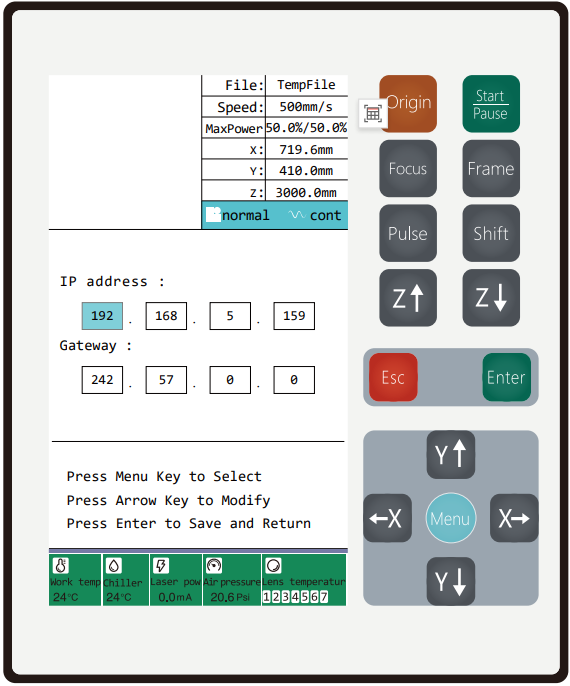 | Press  to move the cursor to select the parameter you would like to modify, press Arrow keys to modify the parameter, to move the cursor to select the parameter you would like to modify, press Arrow keys to modify the parameter,  to add one digital, to add one digital,  to increase or reduce the value. and press Enter to save and return. For example, if you would like to Modify the last digital to 50, You could move the cursor on to it by pressing to increase or reduce the value. and press Enter to save and return. For example, if you would like to Modify the last digital to 50, You could move the cursor on to it by pressing  , Then Press , Then Press and move the cursor to the digital “1”, in this situation, you want to delete this digital, but it won’t happen, you have to press and move the cursor to the digital “1”, in this situation, you want to delete this digital, but it won’t happen, you have to press  to revise the 1 to 0, and then move the cursor to right on to the last digit “5 ”by pressing to revise the 1 to 0, and then move the cursor to right on to the last digit “5 ”by pressing  , Then press , Then press  to revise it to 0. Then press to save and exit. to revise it to 0. Then press to save and exit. |
1. Click the WiFi icon on the bottom-right of your computer screen.
2. From the list of available networks, select the wireless network. The default SSID is AZWIFI-XXXX.
3. Enter the default WiFi password: 1234567890, then click "Connect."
4. Once the "Disconnect" button appears, your computer is successfully connected to the machine's wireless access point. Open RDworks software, then click Settings>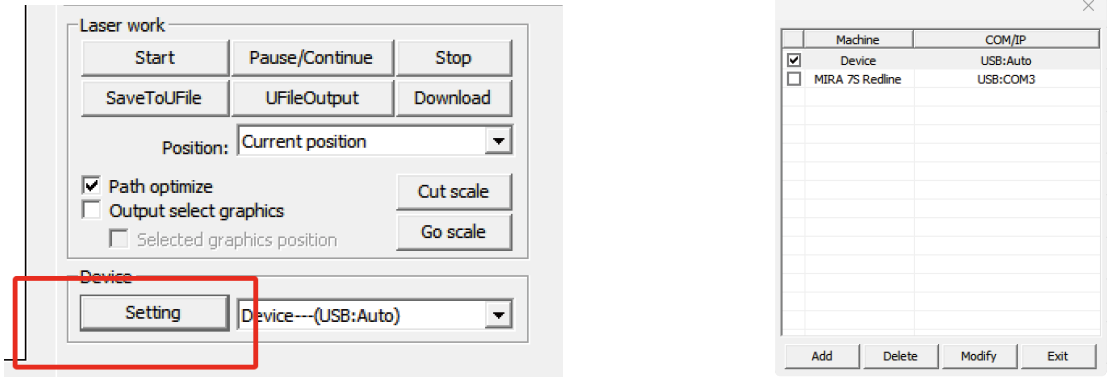
| Click Add>, choose Web>, and input the IP address you got from the control panel. You could also name the link a different name to identify the machine more easily. (The IP is already in the software) | 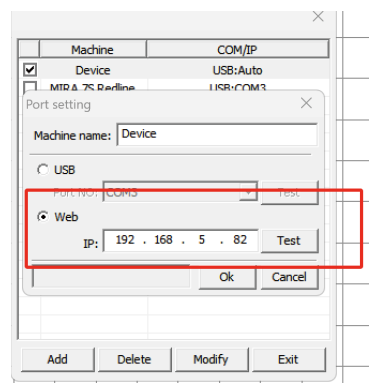 |
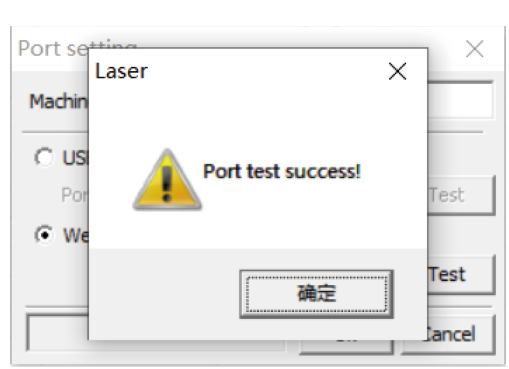 | Click Test, if the machine is connected successfully, it will show “Port test success!” |
Now you’ll be able to control the machine wirelessly through the RDworks software, but in this mode, you can’t access the internet anymore.
Client Mode: The router connects the machine to your local wireless network, enabling both control of the machine and internet access on your computer. For ease of setup, start with AP mode and switch to Client mode for added convenience.
Switching to Client Mode
After connecting the machine in AP mode, follow these steps to switch to Client mode and enable internet access while controlling the machine:
Check Computer IP and DNS Settings:
Ensure your computer's IP and DNS settings are set to "Obtain automatically." This is usually the default setting.
If you encounter linking problems later, revisit these settings.
Setting Up IP and DNS: This process varies by operating system. For Windows 7:
1. Go to Network and Internet Settings.
2. Select WLAN and then Change adapter options.
3 . Right-click the adapter and choose Properties.
4. Select Internet Protocol Version 4 (TCP/IPv4).
5. Set it to Obtain an IP address automatically and Obtain DNS server address automatically.
6. Click OK to save the changes.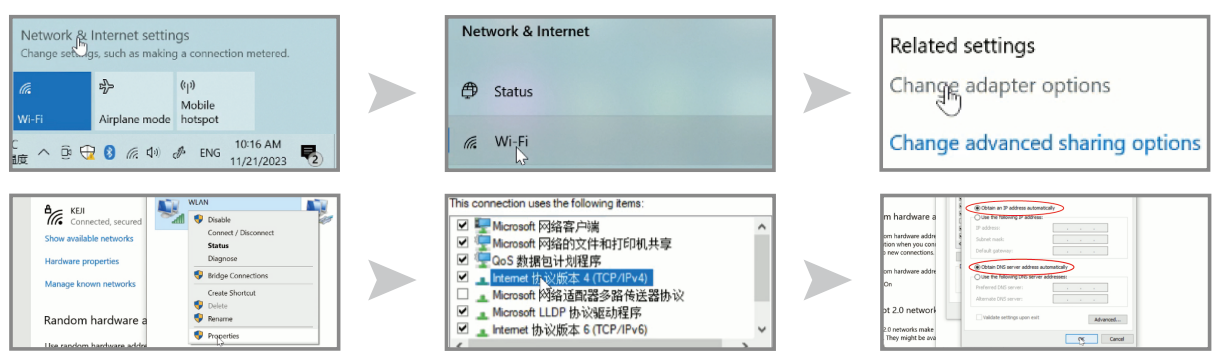
Open the browser, enter 192.168.8.1, and press Enter to enter the router login page.
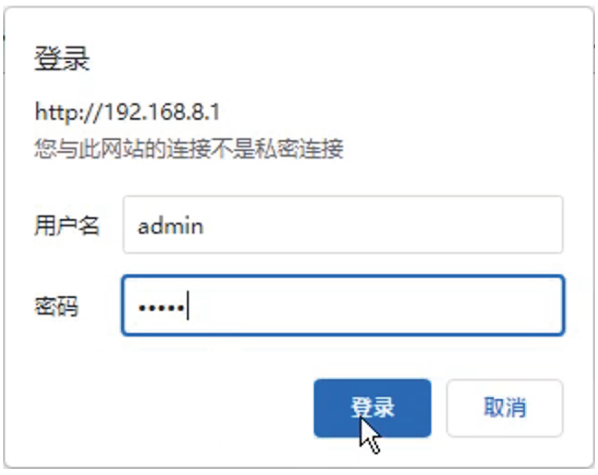 | Login account and password: admin/admin |
| Click Wireless 2.4G | 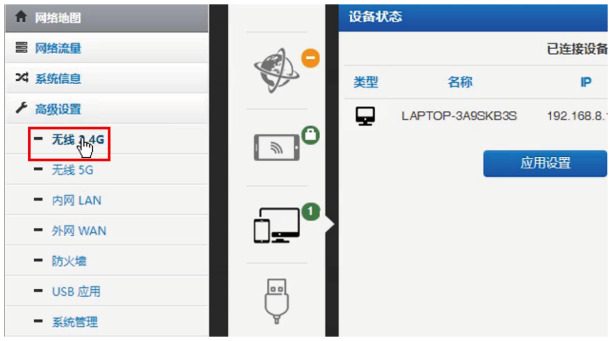 |
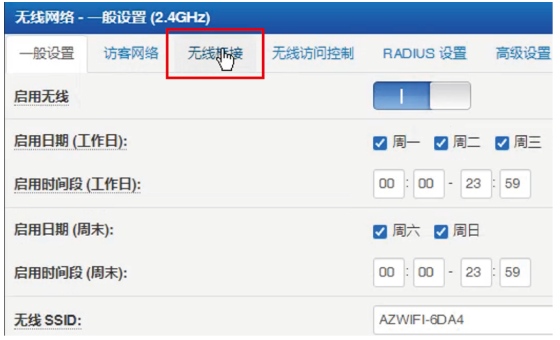 | Click Wireless Bridge |
Click the Wireless Mode drop-down menu and select AP-Client (disable AP)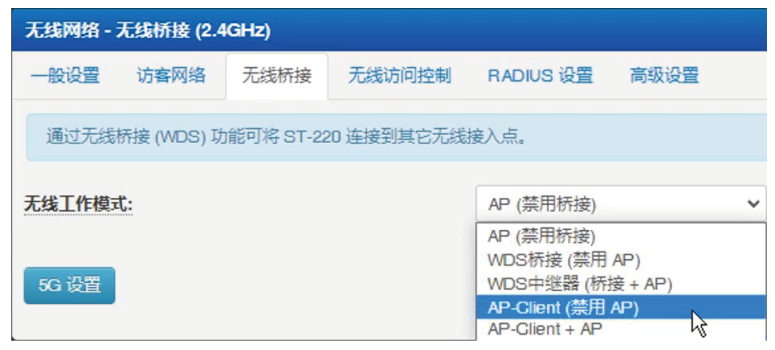
Check the Automatic Search checkbox, click the Parent SSID drop-down menu, and select Scan Wireless AP.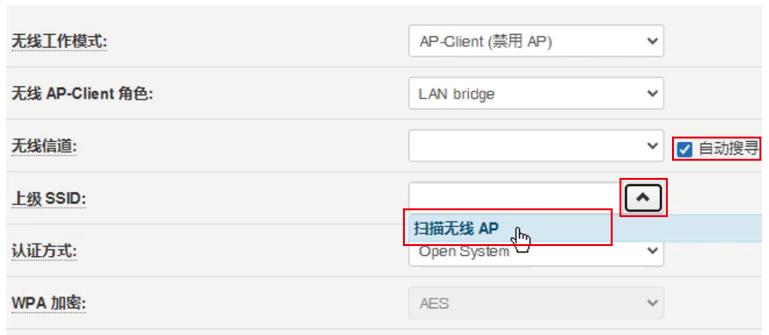
Select a wireless network name (SSID) with the best signal and click.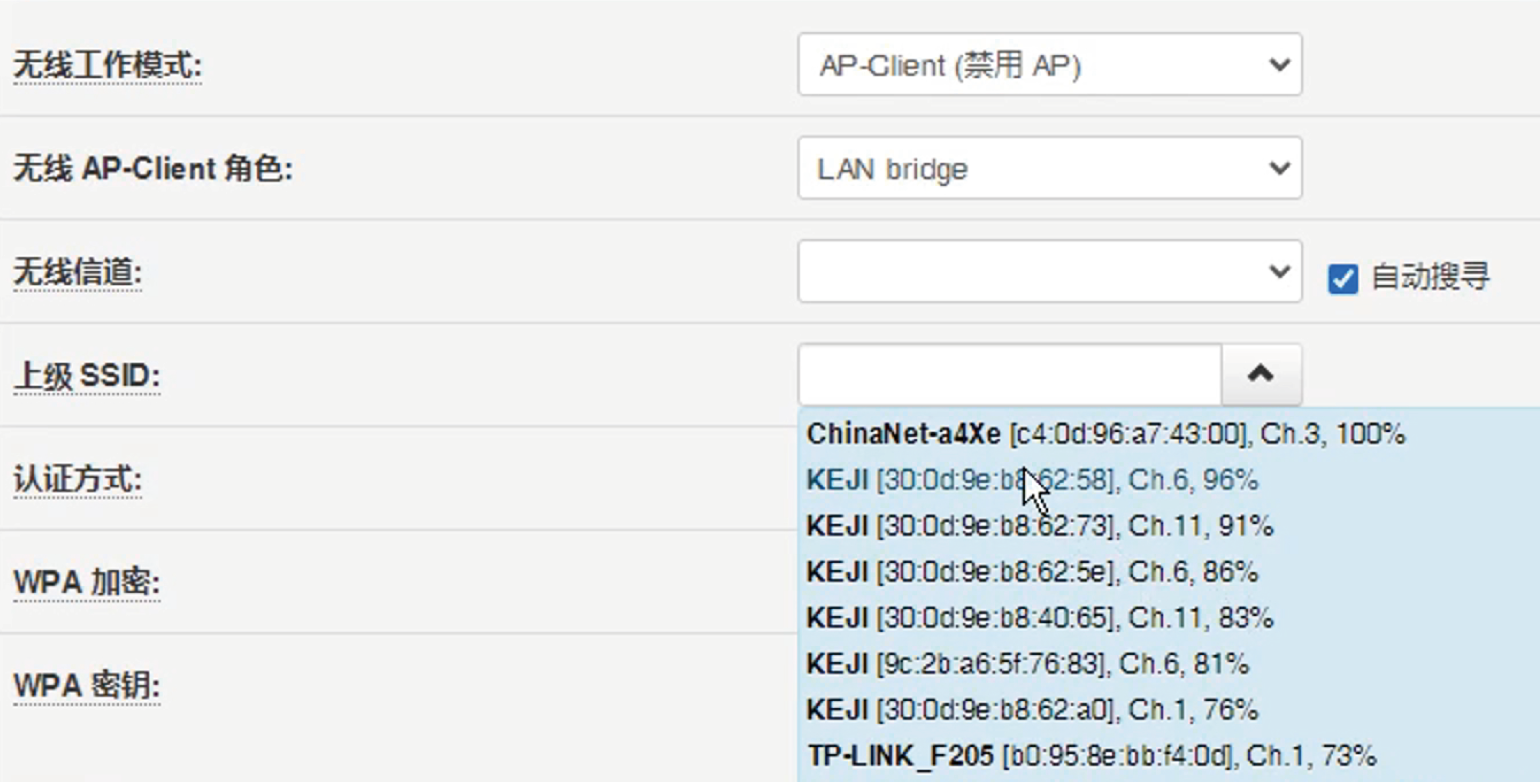
Select the authentication method and password encryption method for the selected WIFI (this is not automatically recognized)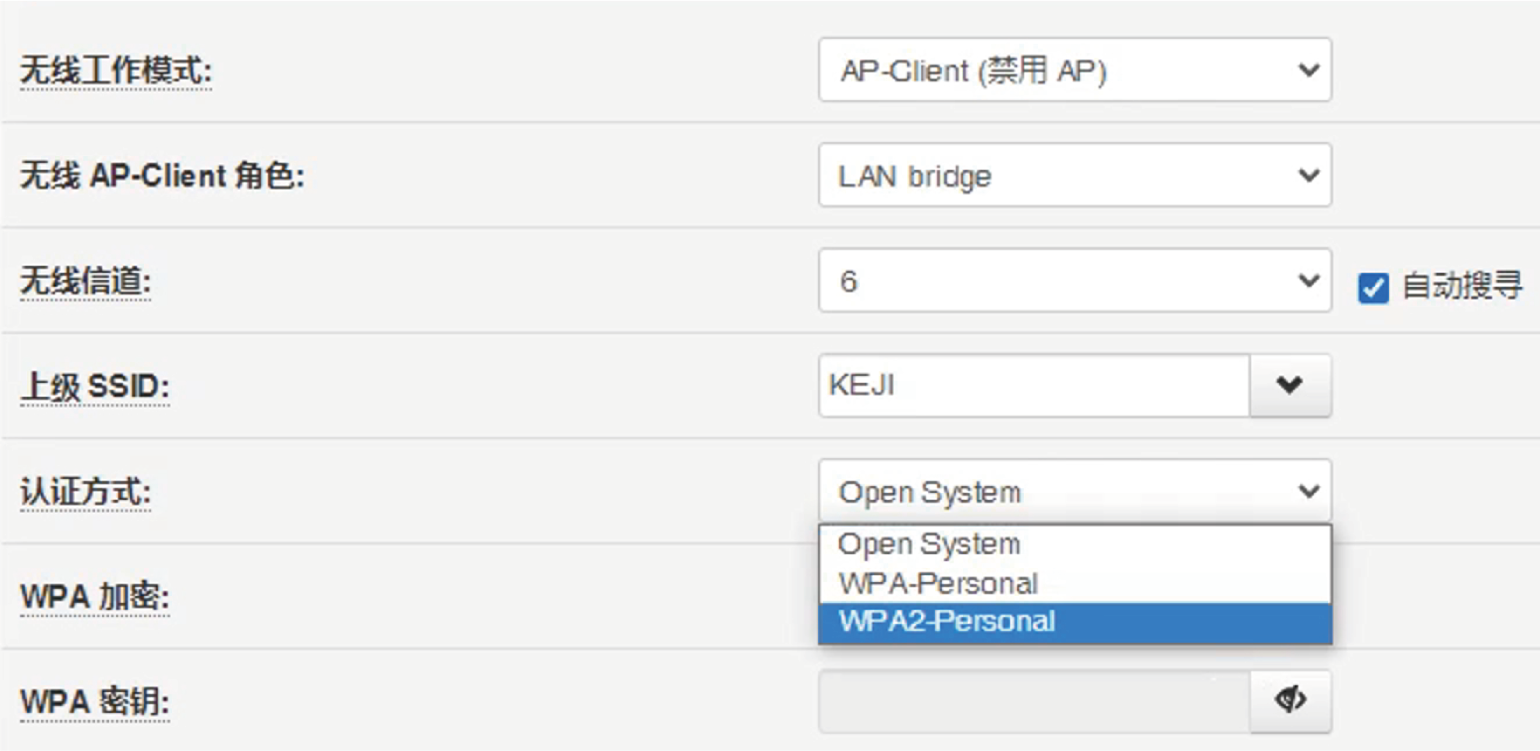
Enter the correct password and click Apply Settings. The router will restart and work in client mode.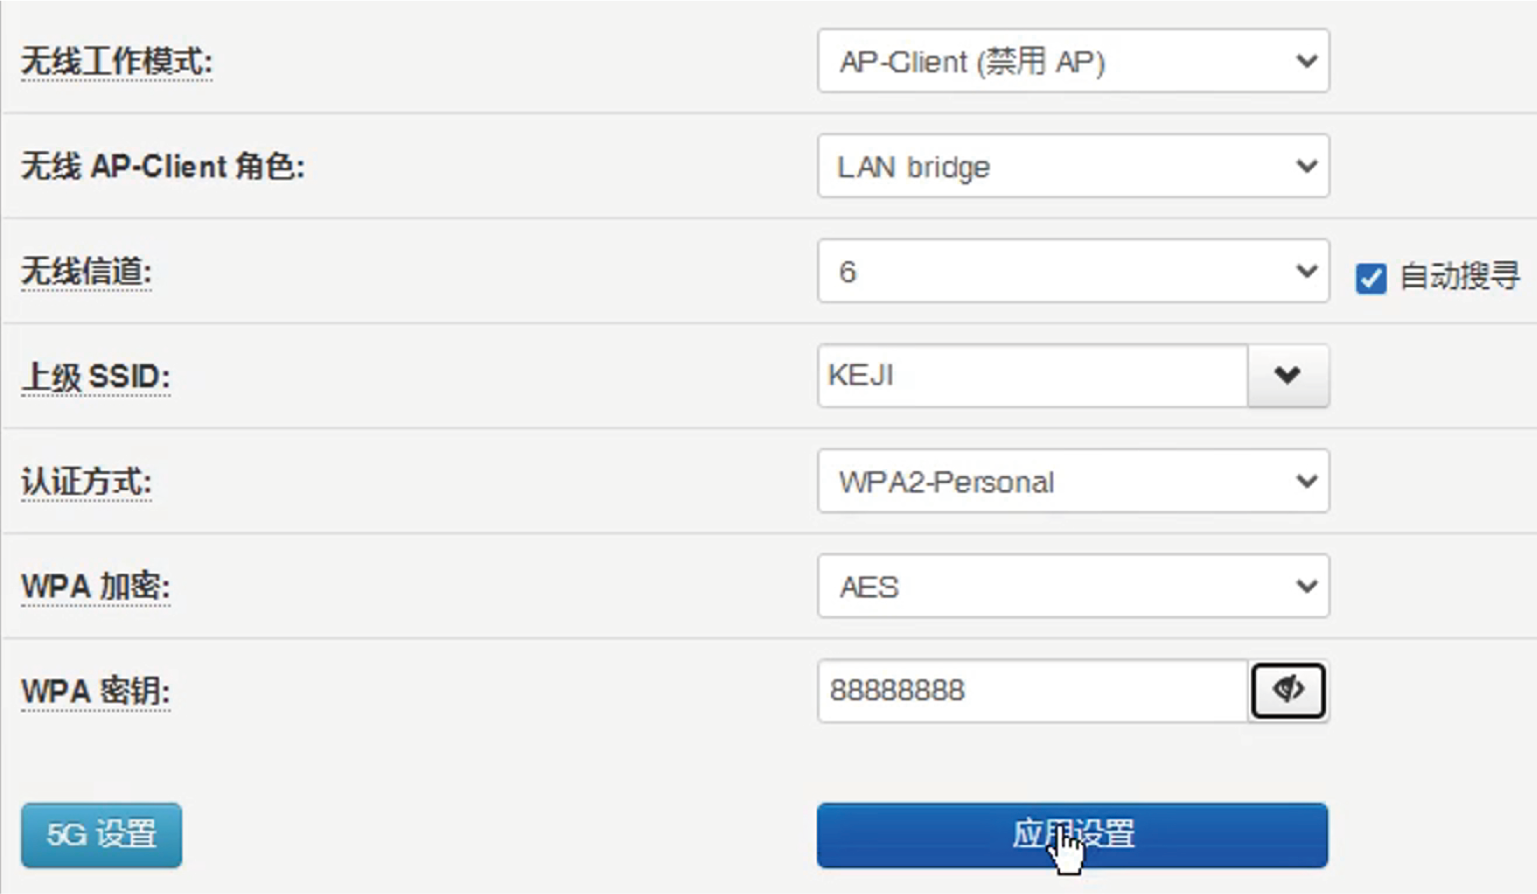
After completing the settings, open a browser and visit www.aeonlaser.net to verify internet access. Then, launch the RDworks software, go to ‘Settings', select the machine connected in AP mode (refer to instructions if not connected), and click Test. If you see **'Port test success!'**You can now control the machine wirelessly while accessing the internet.
 |  |
4.3 Machine Connection for Lightburn
Install Lightburn software.
Download LightBurn
Visit the Download Page: https://lightburnsoftware.com/pages/license-page
1. Minimum Computer System Requirements
i.Windows: Windows 7.0 or later
ii.macOS: 10.11 or later
iii. Linux: Certain 64-bit versions (refer to Linux Installation for details)
iv. Recommended: Screen resolution of at least 1920x1080 (FHD resolution) 2. Complete the Download:
The downloaded file will appear in your "Downloads" folder or the folder you selected.
LightBurn doesn’t require a powerful computer for most tasks, but more memory helps with designs containing many images; a faster computer improves performance with large images or complex vector graphics. To install, double-click the installer file and, if prompted by Windows, confirm that you trust the source to proceed.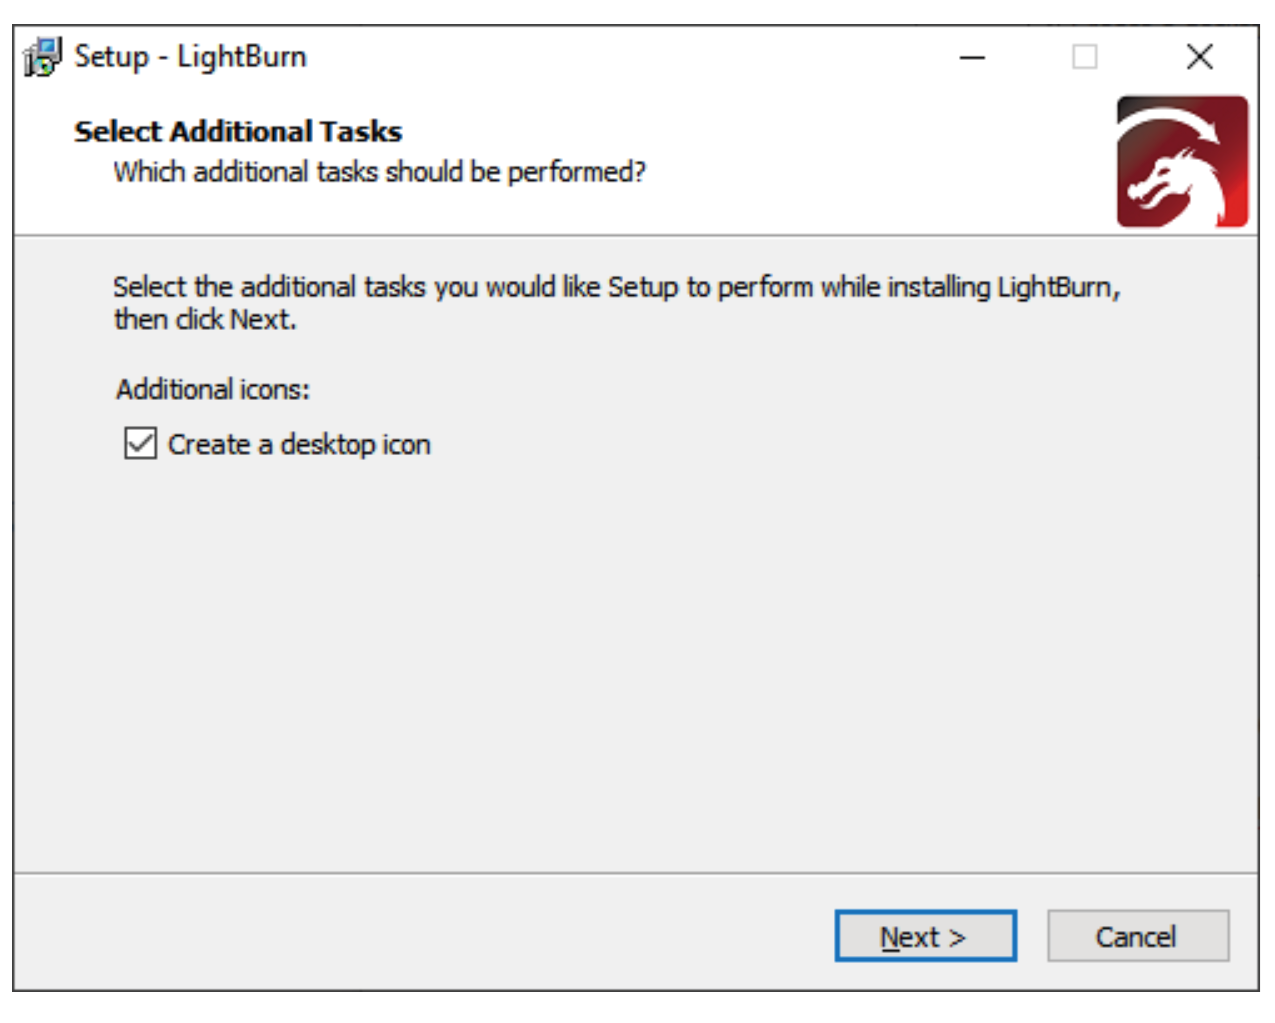 Click Next, then click Install. The installation will proceed. When it completes, you'll see this:
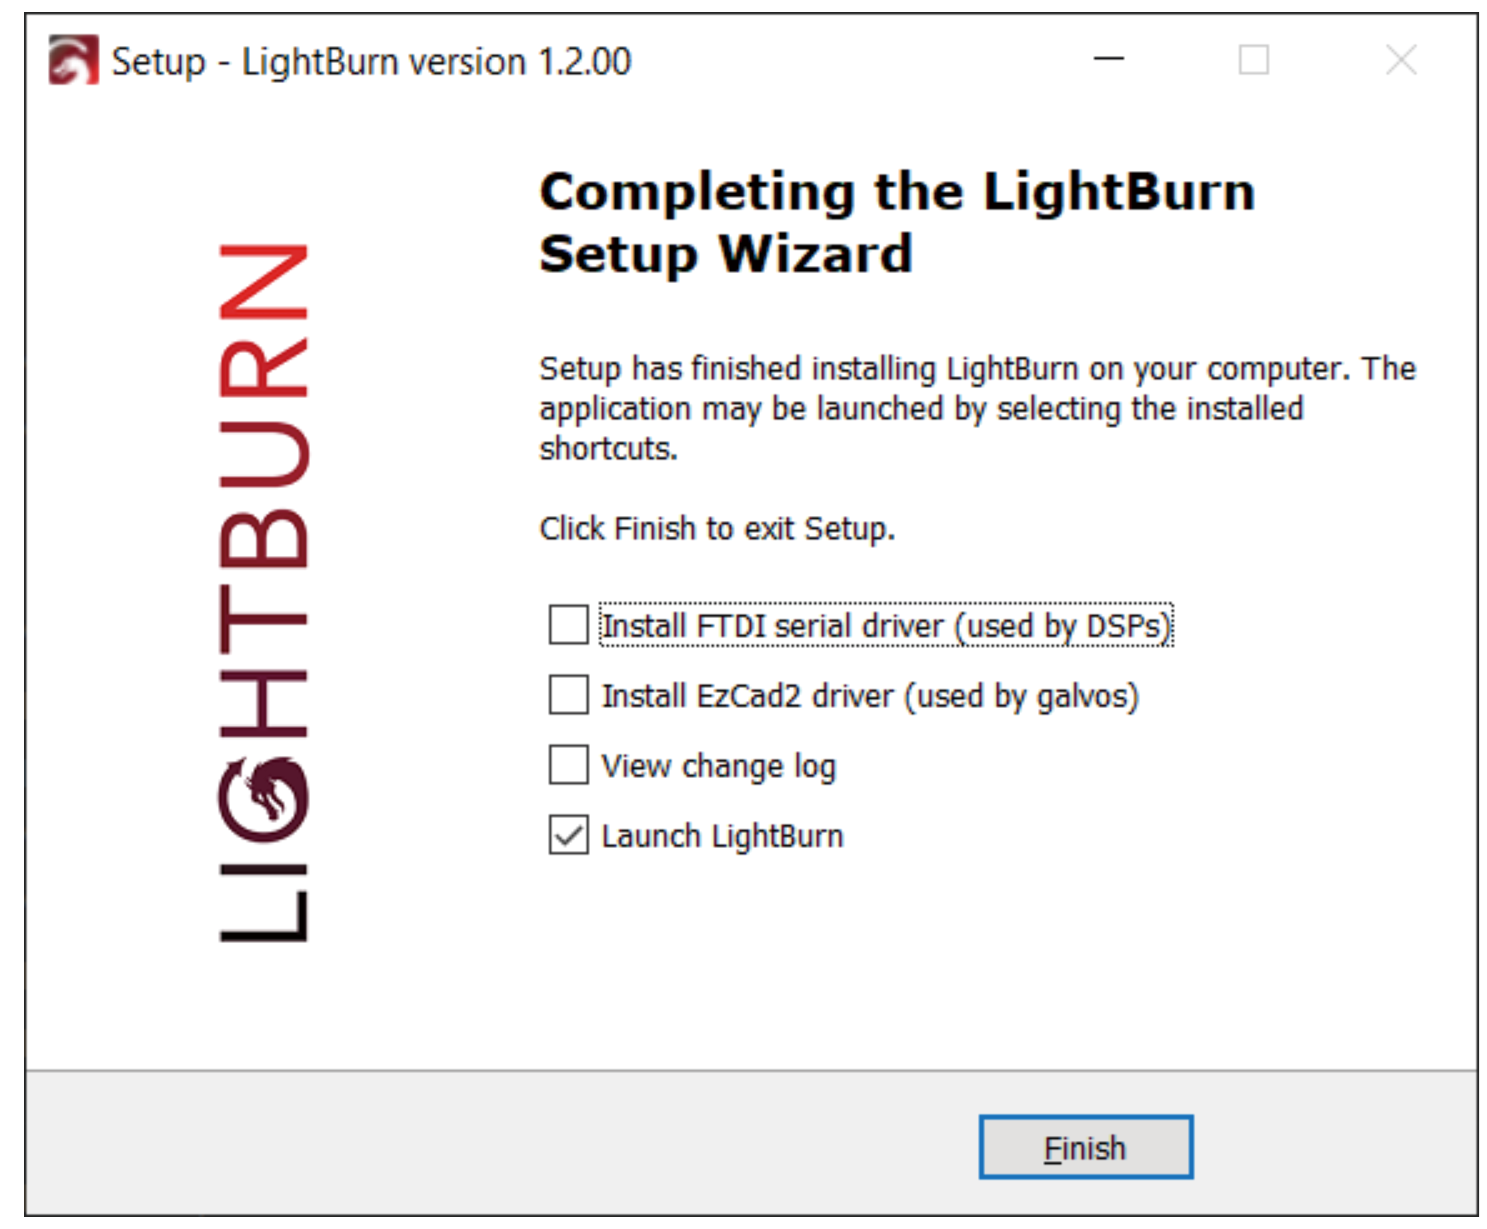 If you have never installed LightBurn on this computer before, you might need to install drivers. This is not necessary when updating an existing installation.
Choose Install FTDI Serial Driver, and wait for the installation Wizard to complete the installation. That's it! Locate the LightBurn icon on the desktop to launch the program.
Connect your machine to Lightburn with a USB data cable.
Insert the data cable into the USB port, and connect the other end to the computer.
Double-click the LightBurn shortcut icon  on the desktop to run the software. Click Devices at the bottom right of the software window.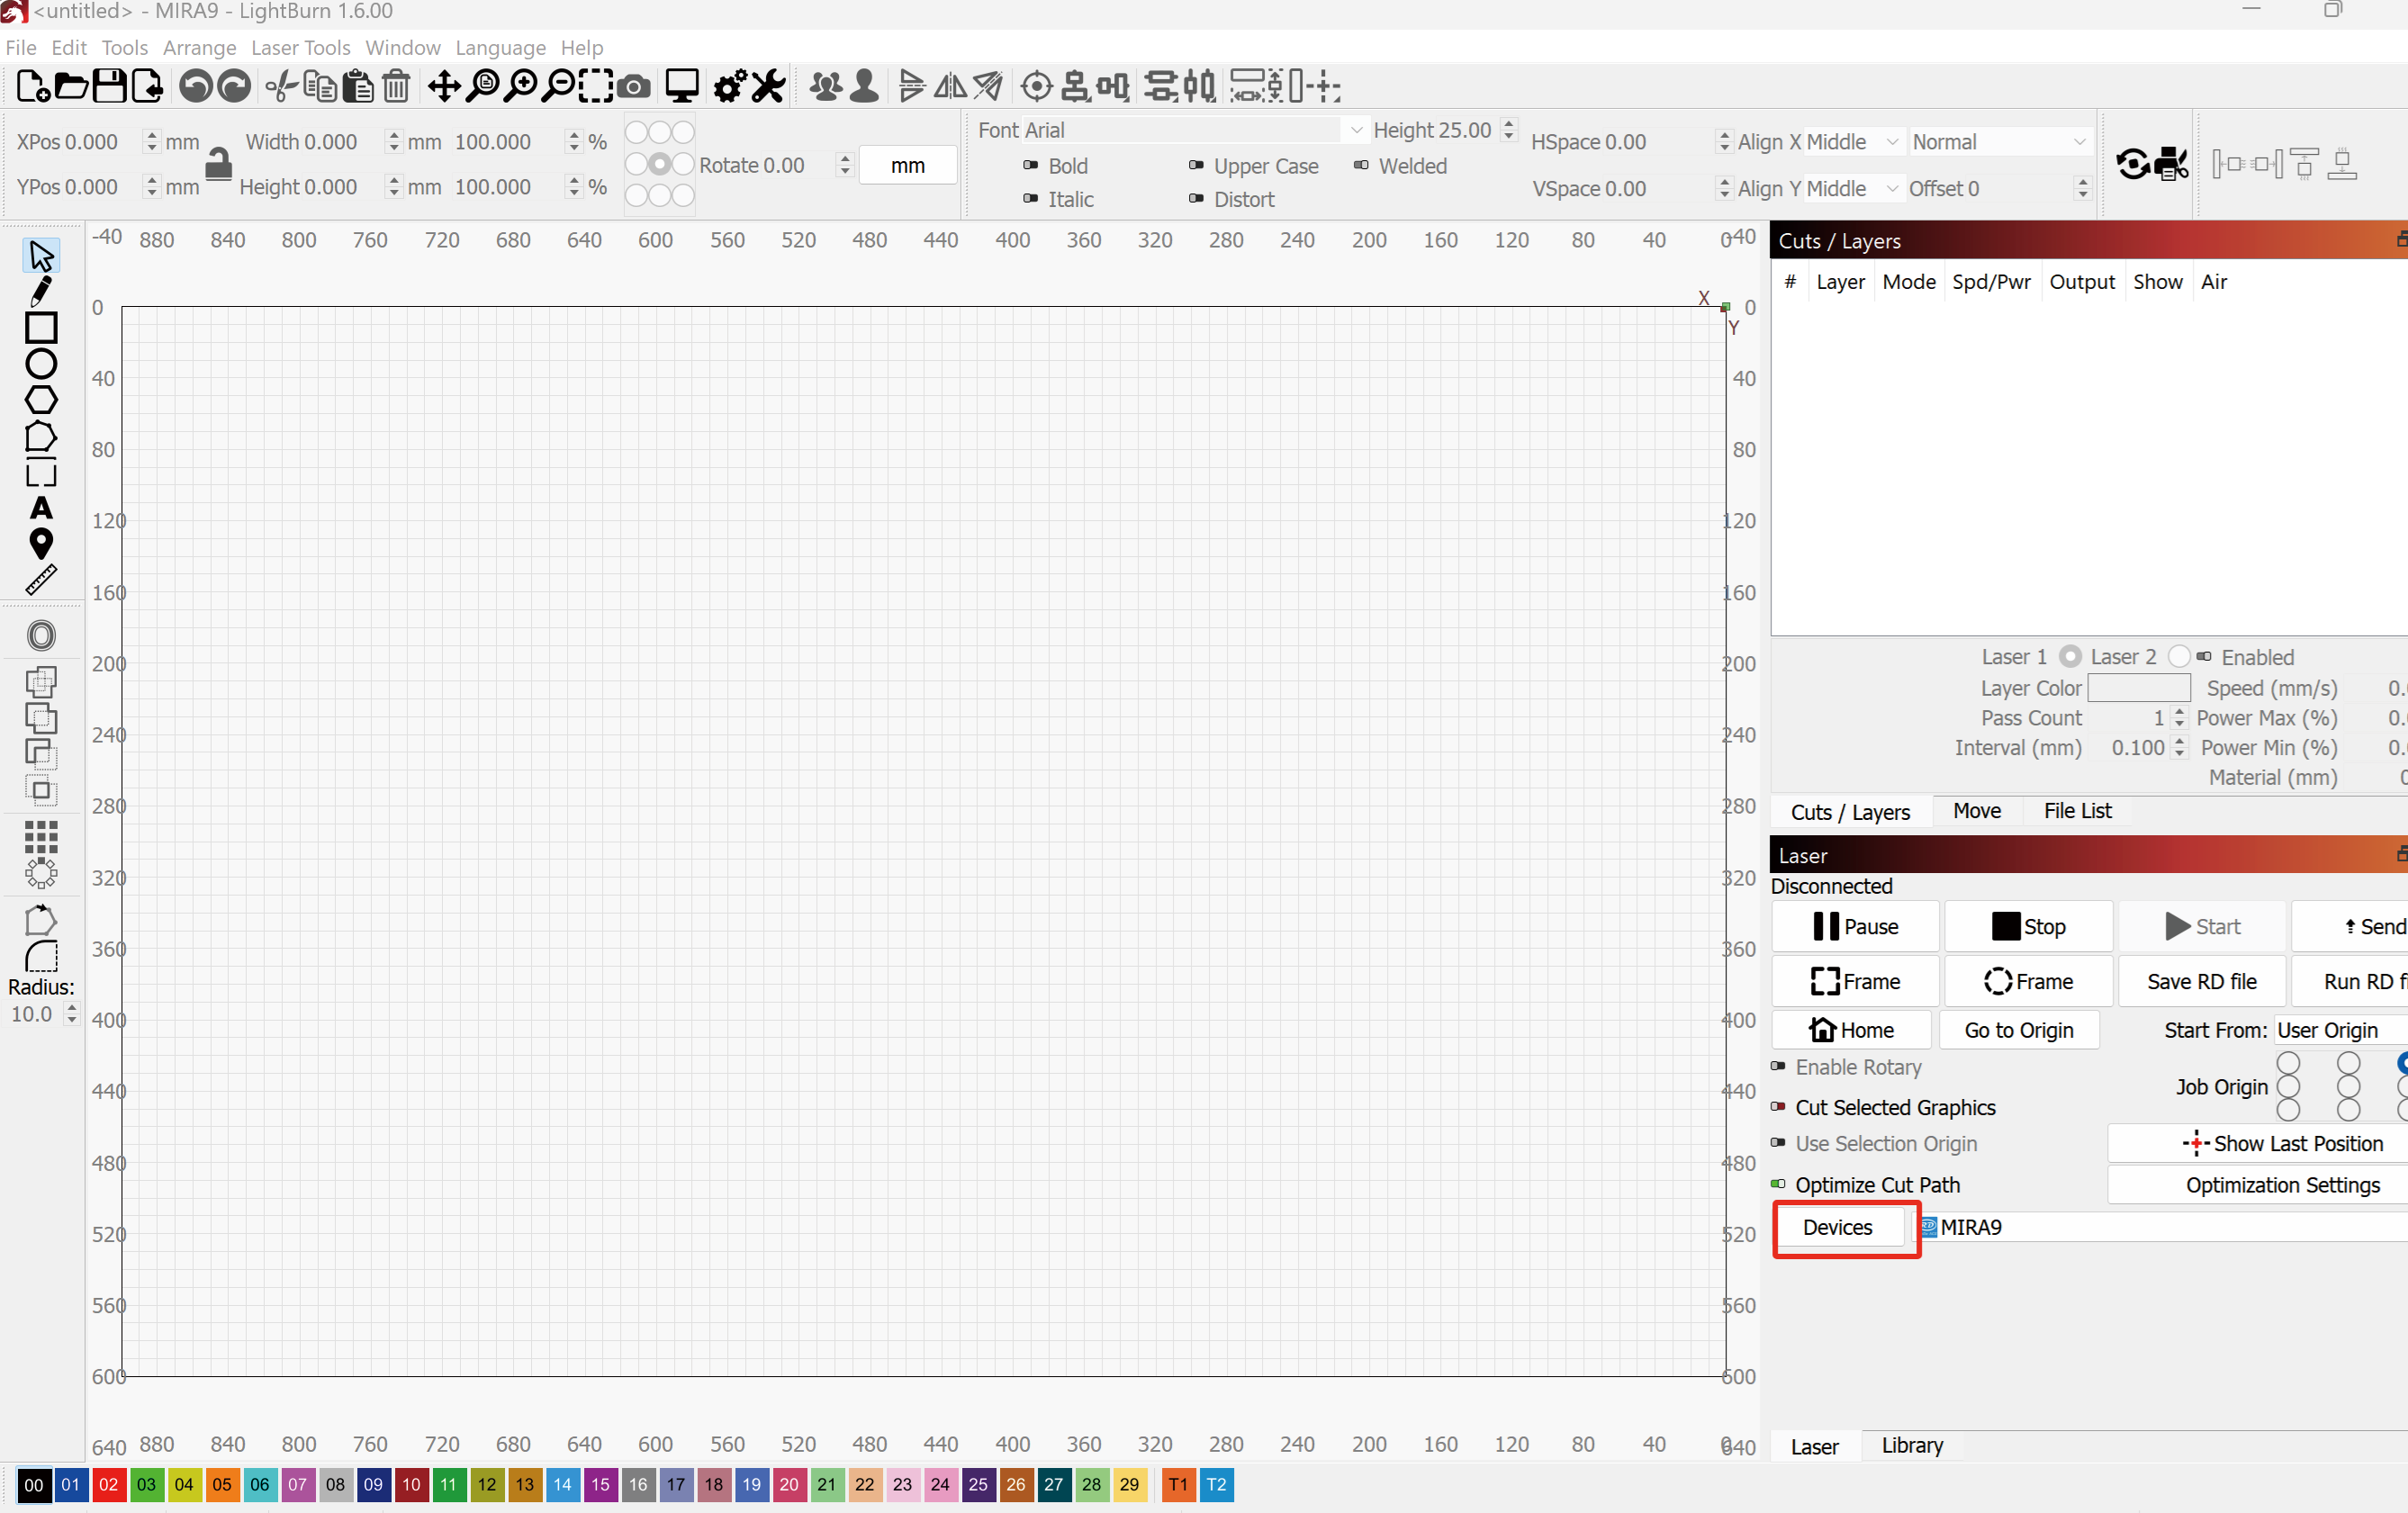
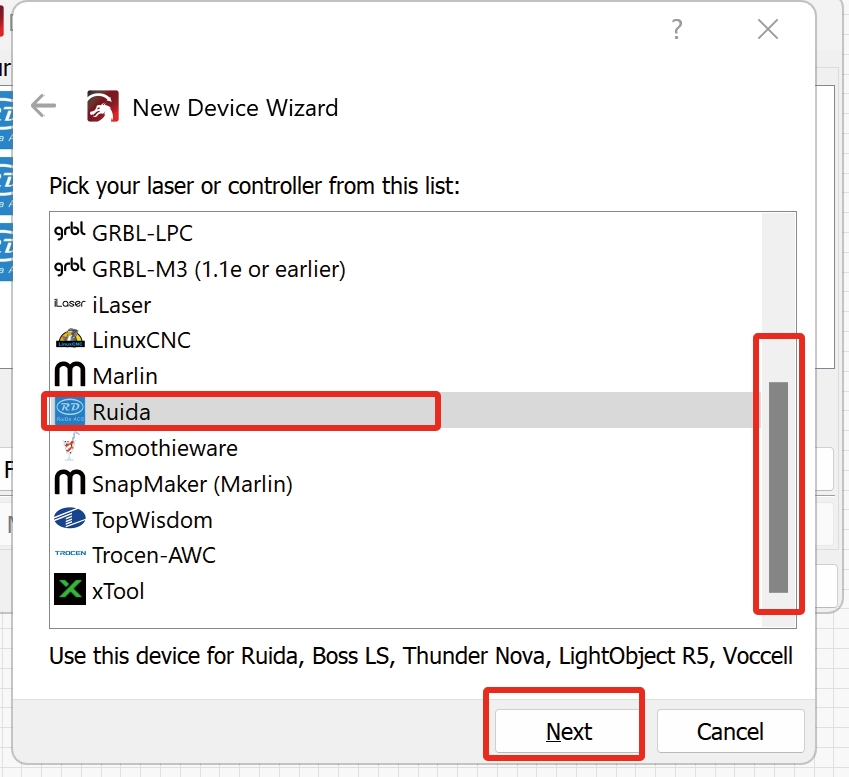
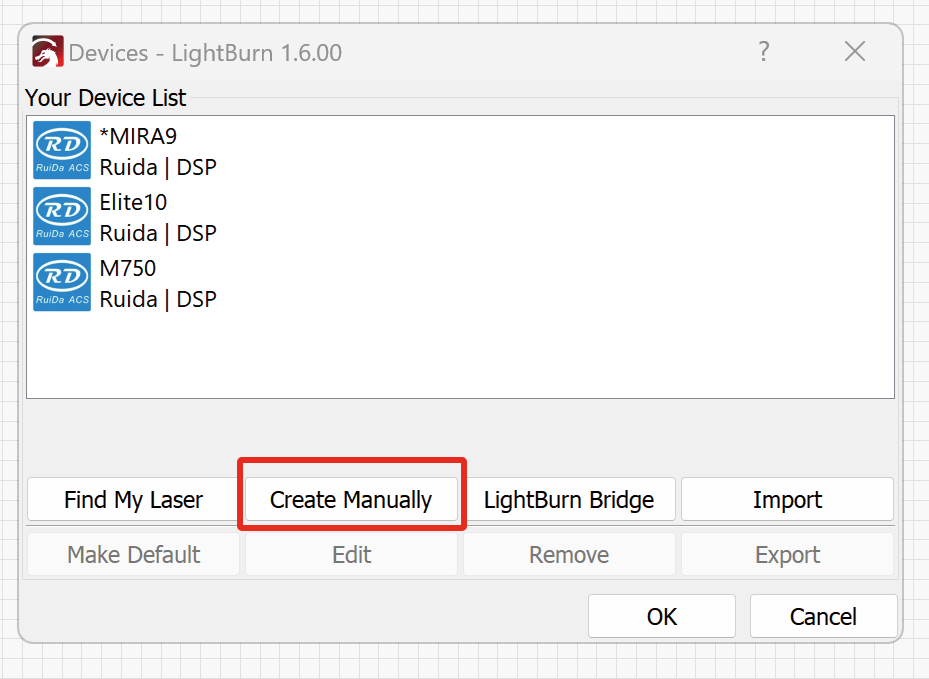 Click, scroll down and find the Ruida controller, select it and click Next.
 Select Serial/USB and click Next.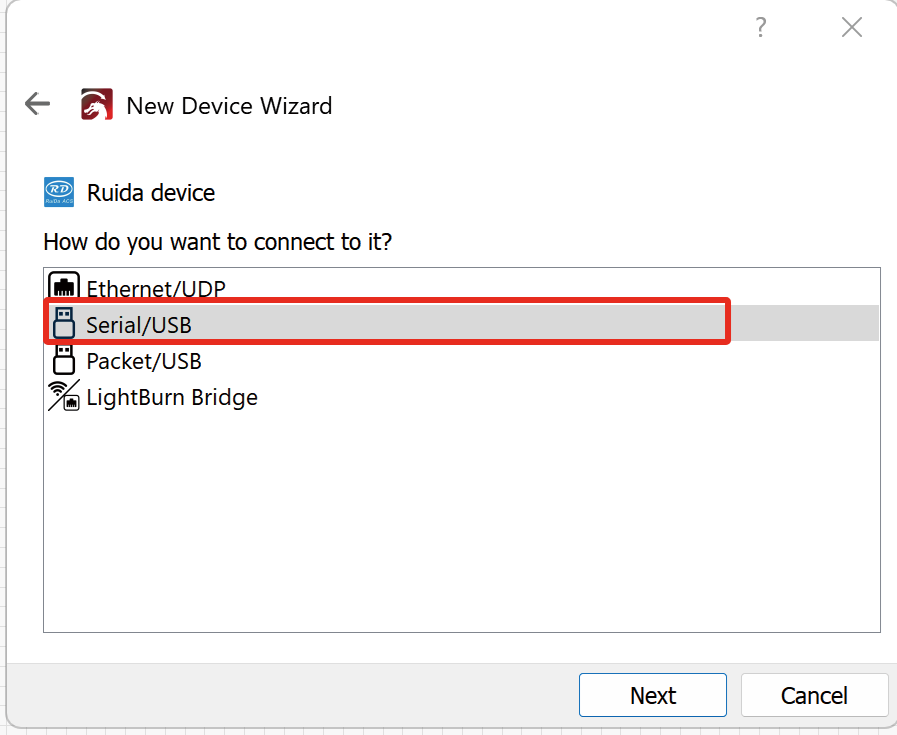
Name the machine and enter the X and Y dimensions. For example, for a NOVA 10, set X to 1000mm and Y to 700mm; for a NOVA14, set X to 1400mm and Y to 900mm. These dimensions represent the working area of your machine. After entering the details, click Next.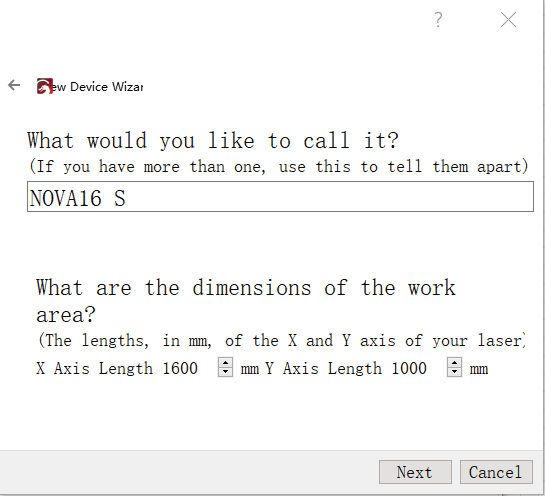
Here, you will need to set the origin of the laser head. We could choose Rear Top Right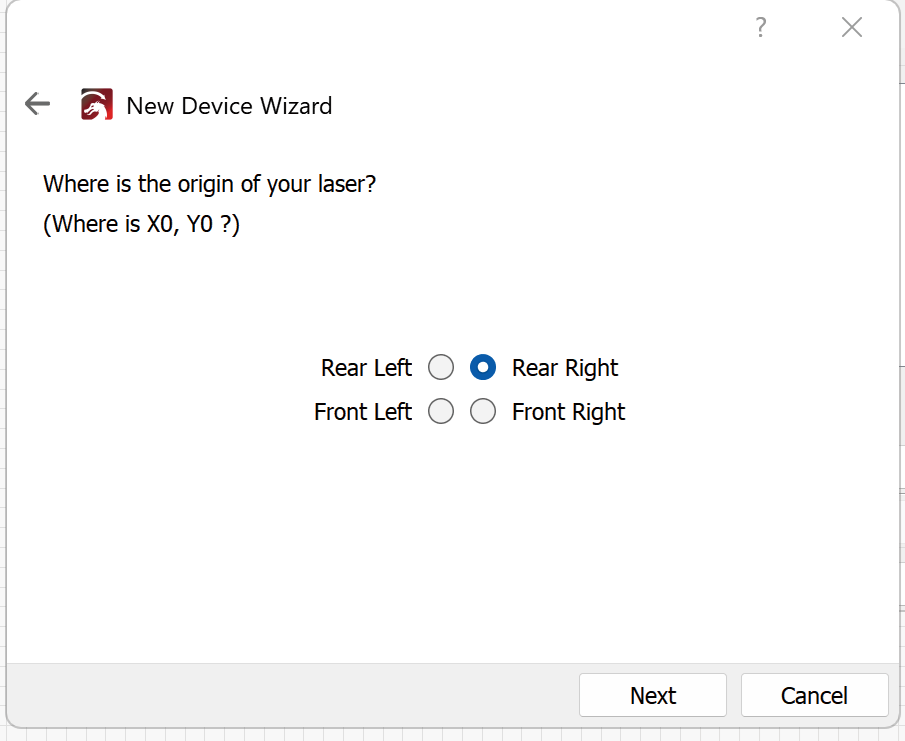
Review the connection summary and click Finish to complete the setup.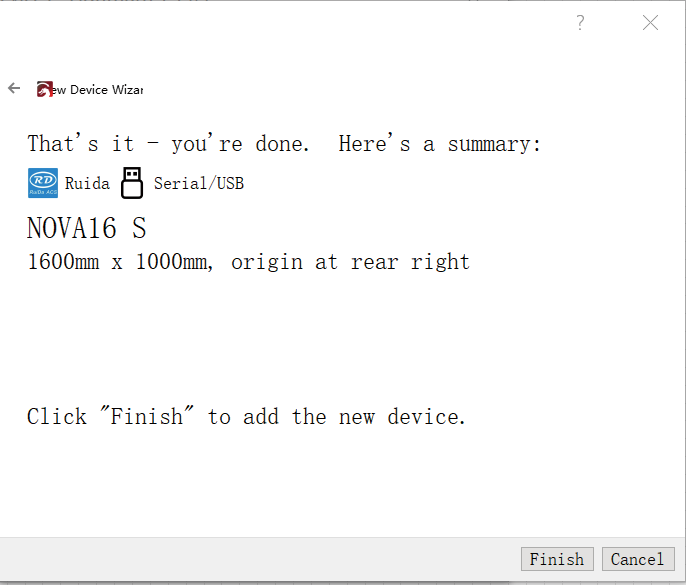
Go to the bottom right of the window, and select the link you just created: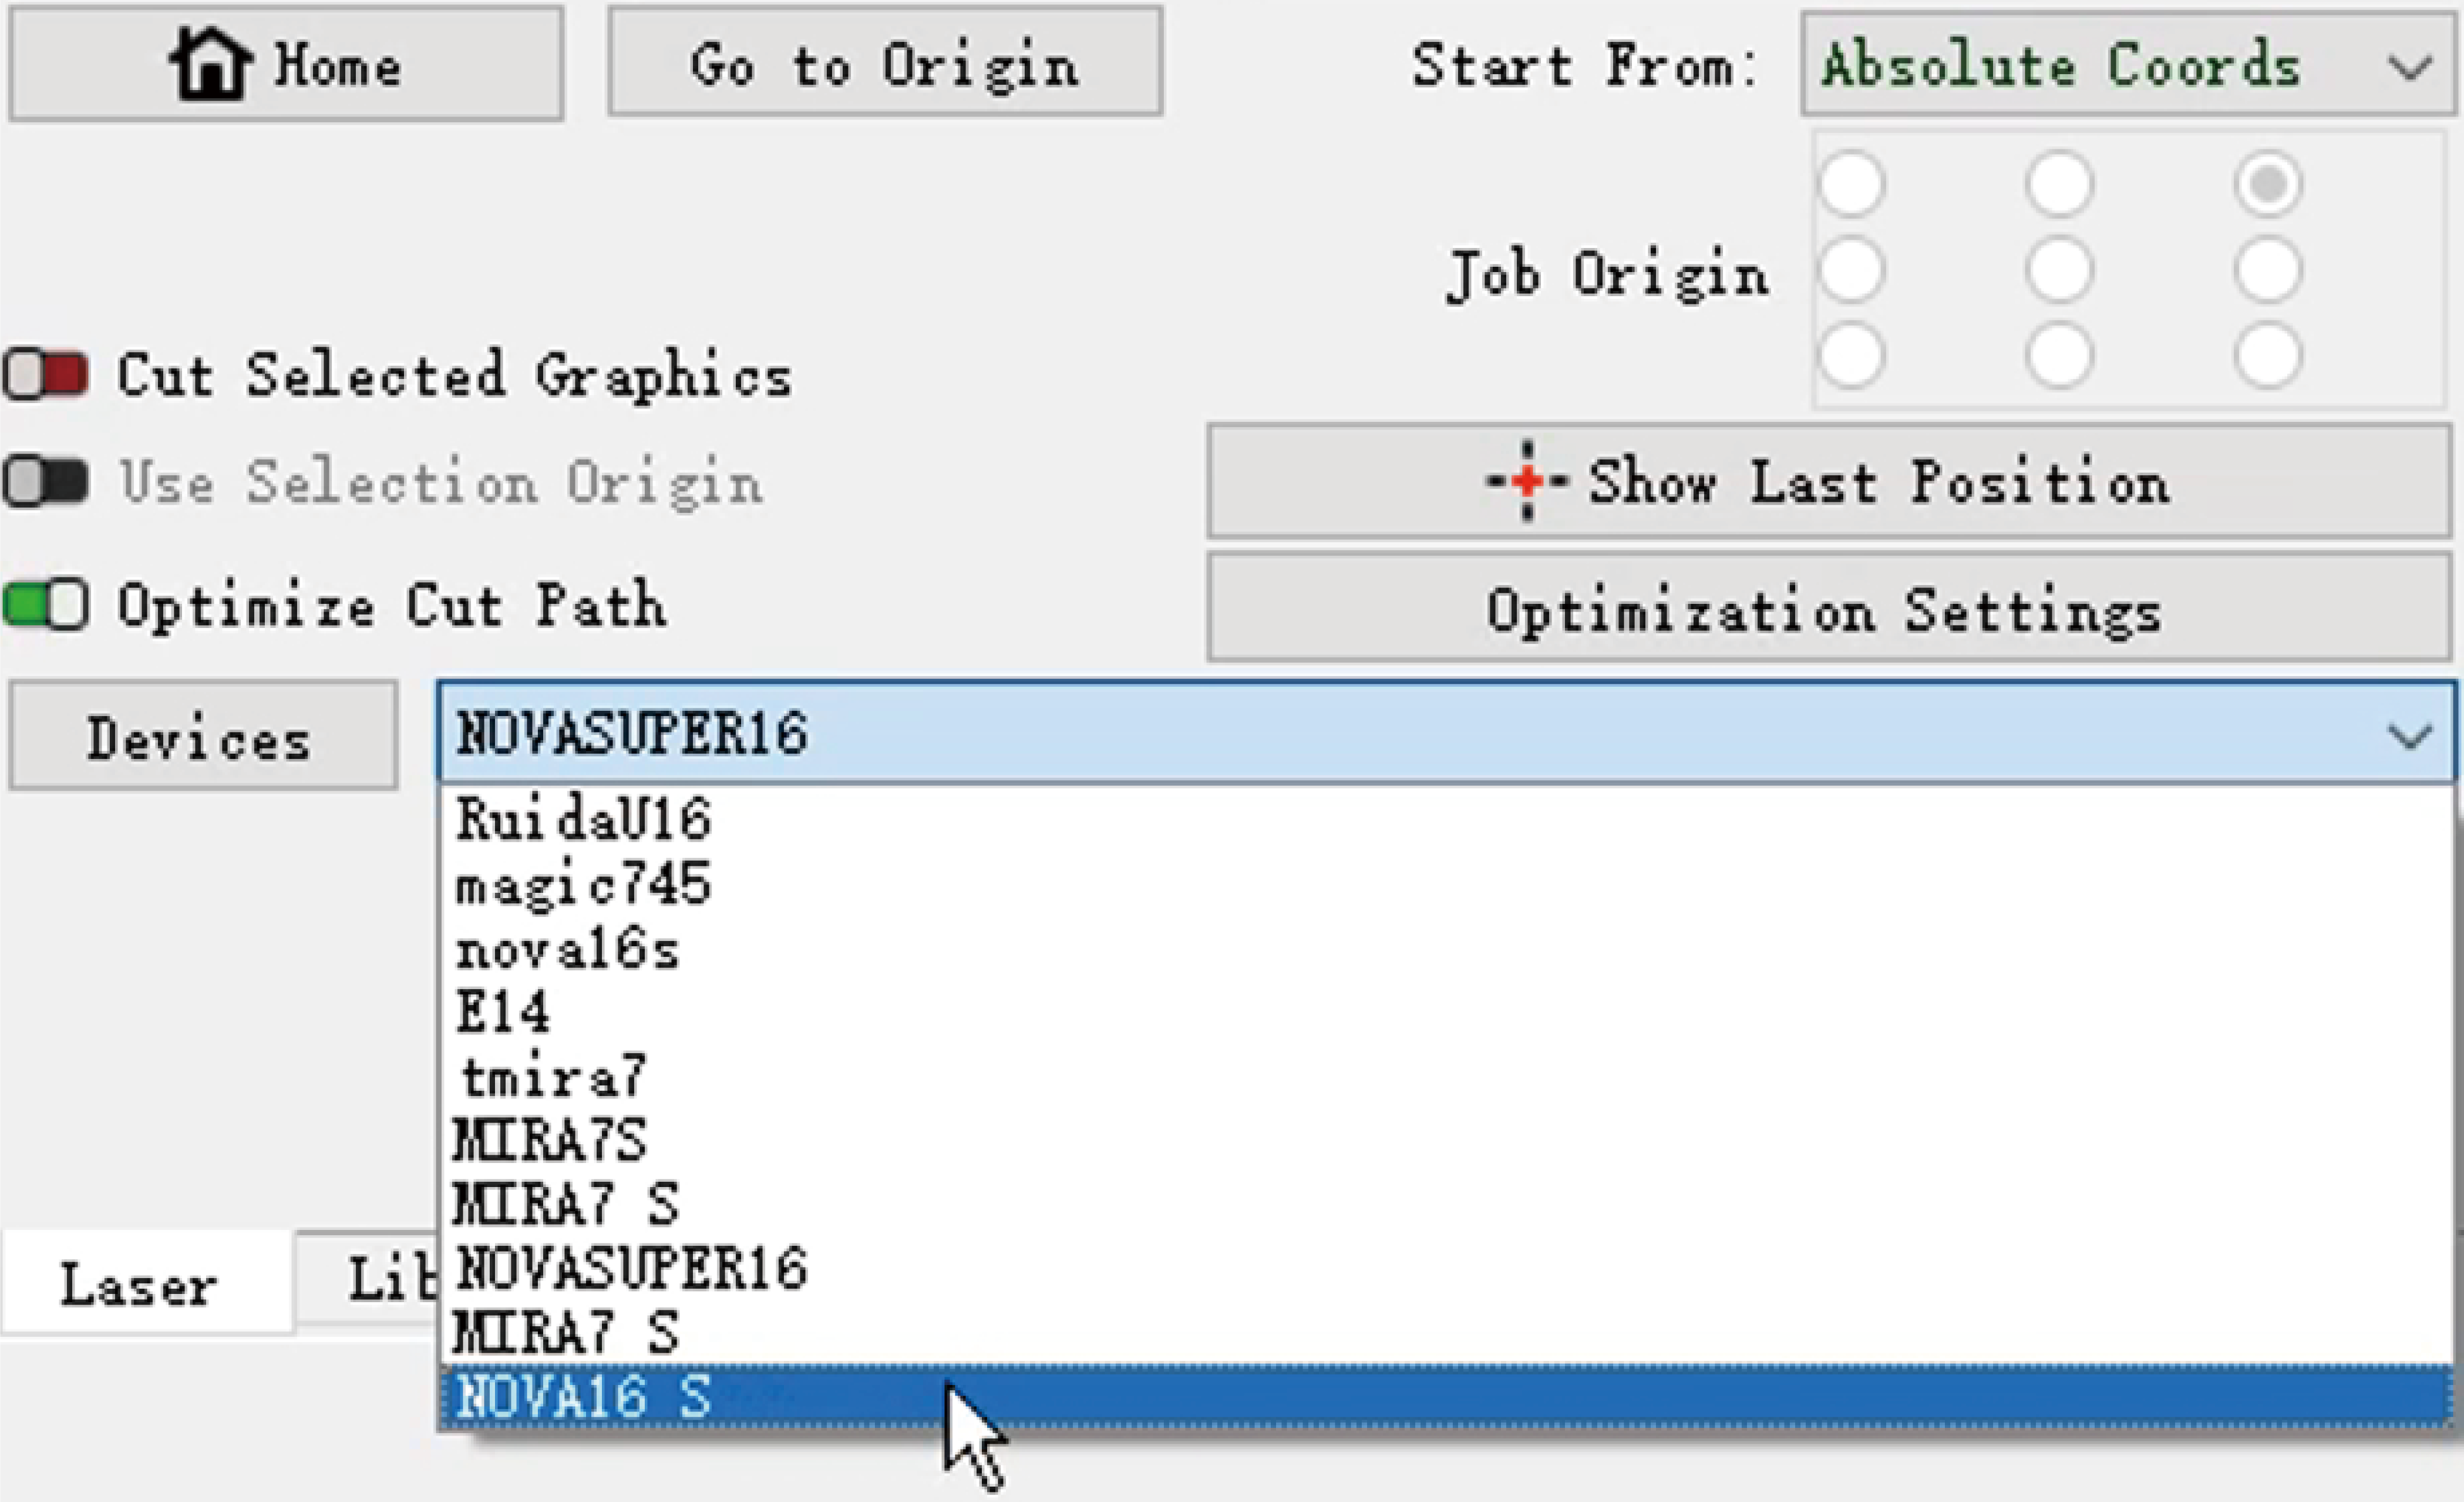
You are ready to go!
Connect your machine to Lightburn via WiFi